These are the 7 best hacks to keep ice in your cooler for longer:
- Use larger blocks of ice—freeze water in a baking sheet to get a large slab of ice
- Pre-chill your cooler with ice a day before you need it, then dump out the water and re-fill with ice
- Line your cooler with aluminum foil—this keeps infrared heat from getting in
- Add a neoprene rubber gasket for less than $20
- Add salt to the ice and don’t drain the water
- Wrap your cooler in a wet towel, or keep it out of the sun
- Bury your cooler 3/4 in the ground if you can
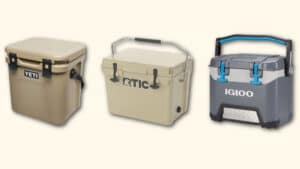
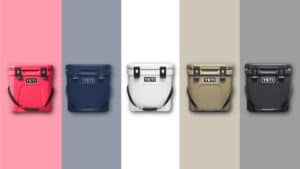
So, you couldn’t splurge on the YETI.
With how expensive those things are, I don’t blame you.
The good news is that there are plenty of ways you can take a regular ol’ cooler that costs less than $100 and hack it so your ice lasts just as long as if it were in a super expensive YETI cooler.
You can use one or two of these hacks to boost your cooler’s performance, or you can do all seven and have more ice than you know what to do with.
SKIP AHEAD
What You’ll Need to Make Your Ice Last Longer In Your Cooler
Some of these hacks make a huge difference, and some make a minor, but noticeable, difference.
Let’s focus on the big ones. To really maximize the length of time your ice stays frozen in your cooler, you’ll need:
- A beach towel
- Baking sheet and space in your freezer
- Rubber gasket seal and glue gun
- Aluminum foil
- Salt
Again, you may only want to try one or two of these hacks to start. Some of them are more extreme and take more effort to pull off correctly.
7 Hacks to Make Your Ice Last Longer In Your Cooler
1. Use Larger Blocks of Ice
I like to freeze water in a baking sheet and then use that sheet of ice as the bottom and top layers of my cooler when I’m traveling.
Ice cubes can chill your cooler faster, but because large ice blocks melt slower, they keep your cooler chilled for longer.
So if you just need to chill some drinks for a day at the pool, regular ice cubes will work. But if you’re going on an overnight trip and you want to make sure tomorrow’s dinner doesn’t go bad, then mix in some large slabs of ice.

Some people also like to fill old milk jugs with water and throw those in the cooler—that also works really well. Plus, when the ice melts, you have water.
But usually, I like to add a few large chunks of ice (in slab form or in milk jug form) plus smaller cubes to get a mix of fast cooling and long cooling.
2. Pre-Chill Your Cooler
Didn’t know this was a thing? Well if you can get the insulation foam down as cold as it can go before you pack your cooler with ice, it’ll give you an extra few hours of icy-goodness.
If I really need my ice to last a long time, I’ll load my cooler with a bag of ice 24 hours before I add my “trip ice.”
So for example, say I need 10 pounds of ice for a three day camping trip. I’ll buy 15 pounds of ice from the store 24 hours ahead of time. Then I’ll take 5 pounds of ice and immediately start chilling my cooler down.
When I come back to it the next day (the day I’m packing and leaving), I’ll dump out the water and load in all the ice I need for my trip (including the big slabs I froze for hack #1).
3. Line Your Cooler with Aluminum Foil
I’m about to throw some science at you. Coolers do their job by minimizing the amount of conduction and convection heat.
But they’re not great with heat radiation (the plastic and insulation soaks up the sun’s heat fairly well, which is a bad thing for our ice).
You know what’s great at reflecting radiation, though? Aluminum foil.
Line the bottom and sides of your cooler with aluminum foil to give a little boost to how cold the inside stays. And if it’s a particularly hot and sunny day, or you need to leave your cooler in a hot car, put some foil on the lid, too. That’ll keep things nice and chilled for much longer.

4. Add a Rubber Gasket
Most cheaper coolers don’t have an airtight seal. But you can easily add one and it costs less than $20.
You can get a neoprene rubber gasket that has adhesive on one side. Just cut the length you need for all four sides of the inside of the lid and stick the neoprene on.
You may have to use a glue gun if the adhesive isn’t strong, but most of the time you should be fine with the adhesive that’s already on the neoprene.
With this rubber gasket around the lid, your cooler is now airtight when it’s shut. This will add a few hours of ice life to your cooler.
5. Add Salt, and Don’t Drain the Water
Water is one of the best insulators of all time. So you can use that to your advantage by salting your ice and leaving the water in the cooler. However, I’d only do this if you’re chilling drinks or have a really tight seal on any food you’re carrying.
When you add salt, you lower the freezing point of the ice. This will cause the ice to melt a little faster at first (it’s why they salt the road before winter storms).
But if you leave the water in the cooler, you’ll basically end up with water that’s below 32 degrees. And there will still be plenty of ice (as that’s now chilling below 32 degrees, too).
Because water is such a good insulator, it takes more heat energy now to warm the water above 32 degrees to melt the ice, and the melting process slows down dramatically.
Plus, you probably already have salt in your pantry, so I would definitely use this trick if you don’t mind having some water sloshing around in your cooler.
6. Wrap Your Cooler In a Wet Towel
Coolers 101: keep your cooler in the shade. That’ll boost your ice life a ton.
But if you want to take that effect to the next level, wrap your cooler in a wet towel.
I do this trick on super hot and sunny days. It’s a must for a hot beach day where I still need ice the following day (or two).
First, the towel shades the cooler, so you’re not getting direct sunlight on the lid.
But another additional cooling element is in effect: evaporation.
It takes a lot of heat energy to convert water into vapor, so by adding a wet towel to the top of your cooler, you’re using a thin piece of fabric to absorb a lot more energy than a dry towel or just the plastic of the cooler would do on its own. And less heat energy hitting the cooler means more ice at the end of the day.
7. Bury Your Cooler 3/4 in the Ground
Here’s a hack: insulate your cooler with the entire planet Earth. You think I’m kidding, but I’m not.
If you’ve ever watched your dog dig up a patch of your grass and lay down on a hot day, you already know that even two inches below the surface of the ground is dramatically cooler than the surface itself.
So let your cooler in on that action.
If you’re staying put at a campsite for a few days, bury your cooler in the ground. Obviously don’t bury the whole thing—you won’t be able to get into it. But if you bury it close to the lid, it’ll be like you have your own little snack hole.
This is also an amazing hack for hot beach days. Because beach sand is so easy to dig into, burying your cooler can take less than 5 minutes and can extend the length of your ice by up to twelve hours. It’s pretty insane.
Ice, Ice, Baby
Collaborate and listen, CoolerSpy is back with a brand new invention: it’s called having ice in your cooler.
And if you’ve got a cheap cooler that struggles keeping ice for 24 hours, then combining a few of these 7 ice hacks will definitely get you over the “full day” mark.
Of all the hacks, the easiest and most effective are:
- Using big chunks of ice (milk jugs or baking sheets)
- Salting the ice
- Wrapping the cooler in a wet towel
The other hacks are all great, but even with the three I just mentioned, you should easily be able to keep ice frozen for much longer than you were working with before.
FAQs
Does putting salt on ice make it last longer?
Yes, salting your ice can make it last longer. However, it’ll start by melting your ice more quickly, but once there’s enough water surrounding your ice, it’ll keep the ice insulated and will keep the temperature below freezing. Because water is such a good insulator, it’ll take much more heat energy to melt the remaining ice.
How long can ice stay in a cooler?
Depending on your cooler and the temperature outside, a cooler can keep ice frozen for up to 10 days. But an average is more like 3-4 days for a great cooler and 1-2 days for a decent cooler.
What keeps ice from melting the longest?
Covering your cooler lid with aluminum foil is the best way to keep the ice from melting the longest, but it’s also crazy looking and the reflection can be uncomfortable to be around. But if you don’t have to look at it, then it’s a great way to keep your ice frozen in your cooler.