You only truly start to appreciate ice once you run out of it. There are ways to avoid that forever.
If you’re looking to fill your cooler with ice without hitting the store, I’ve put together a few DIY ice-making hacks so you can stock your drinks with pure beautiful frostiness without using an ice tray.
SKIP AHEAD
7 Ways to Make Ice Without an Ice Tray
1. Egg Carton Method
If you don’t have an ice tray but you do have an egg carton laying around, then this is the perfect DIY method for you. All you’ll need to make fast and easy ice is an egg carton and some aluminum foil.
Make sure that your egg carton is clean and free of dust, then line each egg seat with aluminum foil. Be careful to use one piece of foil to avoid leaks.
After your carton is thoroughly lined, pour water until it reaches the top of the foil. After a few hours your ice will be ready to be used, be sure to peel off all aluminum foil before putting in your drink.
Ice made with the egg carton method will be small-medium sized, they’re perfect to fill individual drinks and melt at an average rate.
Tips and tricks:
- For smoother looking ice be sure to rub out any creases in the aluminum foil before pouring water.
- Do not put the lid on the egg carton, this will lock in moisture and the ice will take longer to freeze.
- Use a large piece of aluminum foil to cover the egg carton, smaller pieces may cause leaks or spilling.
- Only fill the water to halfway mark if you prefer smaller pieces of ice.
2. Plastic Bag Method
The plastic bag method is perhaps the easiest and fastest option if you need to make ice in a pinch.
Start by filling your bag with water then seal it very tightly to ensure there are no leaks into your freezer.
After the bag is filled and sealed, gently place it in the horizontal position on the floor of your freezer. Check back in after four or five hours. If you lift the bag and don’t see any liquid then it’s ready for use.
The type of ice you can expect to get from the plastic bag method depends on how much water you put in the bag. The video below shows the variety of ice options you can expect to make:
Tips and Tricks:
- Fill the bag completely with water for large blocks of ice that will melt slowly and fit well in a large drink dispenser, be sure to fill your bag completely with water.
- Half full bag of water—for individual cup sized ice only fill the plastic bag halfway with water. The ice will break in medium sized chunks and melt at an average rate.
- Slightly filled bag of water—a thin layer of water will create small shards of ice, perfect for smoothies or snow cones.
|
Best Overall
|
Best Value for Money
|
Best Budget
|
|
4.1
|
4.0
|
3.7
|
3. Measuring Spoon Method
There are a number of benefits to using the measuring spoon method. You can customize the size of each ice cube for each drink, plus they freeze in a fraction of the time of normal ice.
Whichever set of measuring spoons you have sitting in your kitchen drawer will work for this method. Just make sure they’re BPA free.
The easiest to fill these little spoons is to use a cup that has a spout, a standard measuring cup will work perfectly.
Tips and Tricks:
- Place the measuring spoons in the freezer before filling them with water. This will reduce shakes and spills in the freezer.
- To easily remove the ice, run them under hot water for 5 seconds, or warm them in your palm until they slide out.
- Boil ice before pouring to have clear, aesthetic looking cubes that you would find at a restaurant.
4. Muffin Tin/Baking Sheet Method
If you need to make large batches of ice for a party then this is the perfect option for you. Although it takes longer to freeze, it will also take longer to melt.
Muffin Tin Method
The thickness of your ice will depend on how much water you fill each section with. Feel free to mix and match your amount of water for a variety of ice options.
If your muffin tin has staining you can always line it with a thin sheet of parchment paper. This will protect the flavor and color of the ice, as well as making it super easy to remove.
After you’ve filled each section and allowed it to freeze for several hours, let the tin sit on the counter for 5-10 minutes. This will allow the edges to melt slightly and they will be easy to remove and use.
For aesthetic looking ice, slice up some lemon and place them in the bottom of each section before filling.
Baking Sheet Method
Fill a baking sheet about halfway with water, then place it flat on the floor of your freezer. This will need several hours to thoroughly freeze before using.
If you’re looking to fill a cooler or chill a large quantity of drinks, this method will work well.
After the ice is frozen completely, let it sit out for ten minutes to soften the outer layer. In order to break it into manageable pieces you’ll need a chisel or a screwdriver. Carefully apply pressure in the outer corner until the ice breaks evenly.
5. Milk Carton Method
Either a leftover plastic milk gallon, or a milk carton will work equally well for this method. Be sure to rinse the inside of the carton well of any remaining milk before using
Start by cutting one quarter off the top of your carton, then fill it about halfway with water. Set it in the freezer until it becomes one solid block of ice.
Alternatively, once your ice is ready you can remove the carton and have a giant, smooth ice block. This will work well if you have a large container or liquid, or if you can chip all of it immediately.
Now, with either an ice pick, a screwdriver or hammer head, carefully chip away small pieces and collect your desired amount. You can always re-freeze the remaining block and chip away pieces when needed.
Tips and Tricks:
- Do not fill the carton to the top. Water expands as it turns into ice and needs extra room to grow.
- Use different size cartons according to how much ice you need. The 250ml lunch box sized milk cartons make the ideal mini batch of ice. A liter sized carton will make a party-sized amount of ice.
6. Silicone Molds
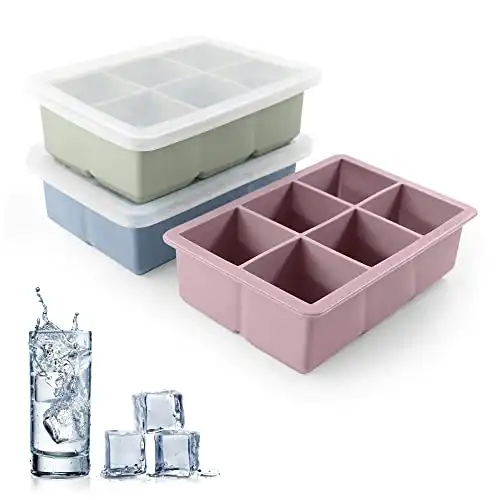
Silicone molds have become very popular in recent years, they make cooking and baking a breeze thanks to their nonstick surface. You make anything from donuts, jello, chocolate, cupcakes and hard candy with silicone trays.
These are a super easy way to make ice, and the best part is that they’ll take the shape of whichever molds you have on hand.
Whether you have individual silicone cupcake molds, or even some Christmas gingerbread molds hiding somewhere, they’ll make easy and efficient ice.
Since they are made from silicone removal will be easier than ever, their bendable structure allows you to wiggle them free in seconds.
Tips and Tricks
- Cupcake molds—for breakable ice only fill them one-quarter full, for glass-sized ice fill them halfway full.
- Cookie shaped molds—fill the entire shape fully with water but break off any large pieces before using.
- Add chopped fruit or herbs to these molds for decorative, flavor infused ice cubes.
7. Tupperware Method
The same plastic containers you use to take leftovers to work can actually make some pretty decent ice as well.
The shape or size doesn’t matter, grab your plastic container and fill it with about two inches of water. Make sure that it is level when you place it in the freezer, otherwise one side will be much thicker.
After it’s frozen, run it under the tap for around thirty seconds.The water should be room temperature, don’t use hot water or it will damage the ice.
Once the ice has separated from the plastic container, set the block on a wooden cutting board. Using the back side of the spoon hit the ice with medium force until it starts to break off in chunks. Scoop the chunks into the original plastic container and store them covered in the freezer.
Let There Be Ice
Which of these DIY make your own ice methods would you like to try out next?
The most important tip to remember when making your own DIY ice without a tray, is to always give the water room to expand. Especially when using a plastic bag or container, if you don’t give the ice room to grow it will break through the bag and permanently stretch the container.


