Keep ice cream frozen in your cooler by making a DIY ice block using a brownie pan in your freezer. Line your cooler with tin foil and place the large ice block at the bottom. Place the ice cream in, surround with ice, and add salt to the ice.
With summer upon us, and the cost of ice cream reaching the double digits (yikes!), packing a cooler with goodies from home is a necessity.
I feel your excitement for the pre-beach grocery haul. You smear your nose with sunscreen and stroll the chilly aisles of your grocery store, tossing the tastiest summer treats in your cart.
Chips, check. Pre-packaged sandwiches, check. And of course, ice cream, double check.
Sadly, I also know the pain of opening your cooler mid-day only to find your sandwiches swimming in what used to be ice, soggy chip bags, and liquid ice cream.
In this article I’ll show you everything you need to know to keep your ice cream frozen in your cooler.
SKIP AHEAD
What You’ll Need to Keep Ice Cream Frozen in a Cooler
- Water and a Freezer
- The most important ingredients to make ice.
- Baking pans
- Use these to create homemade ice blocks that put store-bought crushed ice to shame.
- Towels
- A final touch to dip in water and wrap around the cooler once properly prepared.
- Aluminum foil
- Works wonderfully to keep hot foods hot, but more importantly: cold foods cold
You probably already have most of these products laying around your house anyway, and you’ll be shocked at how well they extend the life your cooler treats.
If you don’t have all of these don’t worry, even just implementing one or two of these DIYs will make a big difference.
Substitution: Baking pans can also be substituted with baking sheets or casserole dishes. Also, feel free to use any old towels you’ve got laying around, they’ll all work perfectly.
Why Ice Cream Melts in Your Cooler Even Though It’s Filled With Ice
The fact of the matter is, even the best cooler and the coldest ice don’t stand a chance against the summer sun.
However, it’s likely that your cooler’s ice is melting at a much faster rate because it hasn’t been properly packed.
Did you ever look over at your neighbors, sitting on their towels for hours, enjoying seemingly endless cold drinks and frozen treats?
There are two possible answers, either they have a high-quality, industrial strength cooler…or they know how to pack it properly.
In the next section we’ll teach you proper packing techniques so you can keep up with the Joneses.
Another reason why your ice cream may be melting even though the cooler is filled with ice is because of the cooler quality.
We all know the run-of-the-mill white, styrofoam coolers. They’re affordable, lightweight and easy to travel with. The only problem is, that flimsy styrofoam doesn’t get you more than an hour or two max of chilly snacks.
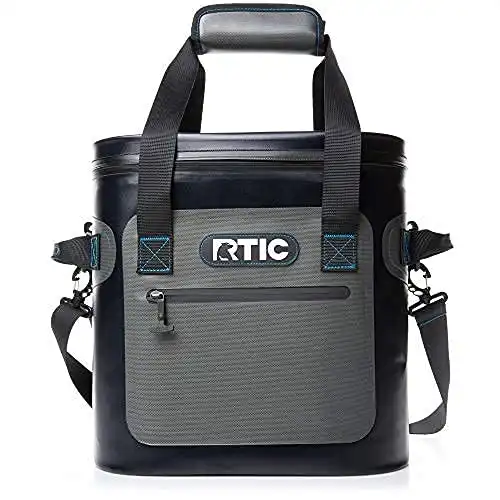
If you’re looking seriously up your cooler game, the RTIC 20 Can Soft Cooler is an excellent option and reasonably priced while still offering top-tier insulation.
If you're bringing beers to the party, this soft-sided cooler is a much easier way to get them there (compared to a heavier hard-sided cooler).
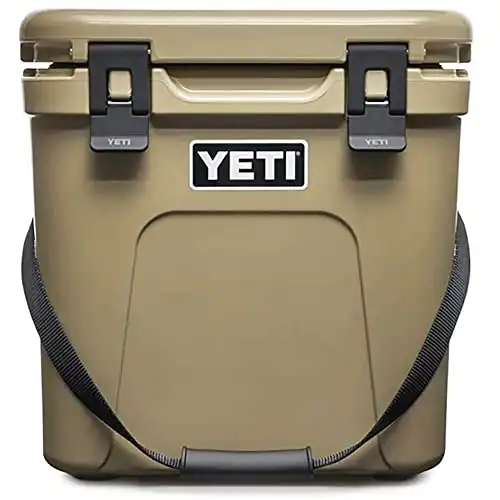
If you’re looking to “go big or go home,” the YETI Roadie 24 is for you. When we compared this YETI against other 20 qt hard coolers, this performed the best in our insulation and ice retention tests, and it’s ideal for a two or three day overnight trip.
Compared to other hard-sided coolers in the same size category, the Roadie 24 has better insulation and it’s more practically easy to pack into your car and hit the road.
Plus, because it’s around three inches taller and three inches slimmer, it makes for a more convenient seat or table-top when camping.
How to Keep Ice Cream Frozen in a Cooler Without Dry Ice
The best way to keep ice cream frozen in a cooler is with dry ice. But that requires a separate trip to the store. So I’m going to show you how to keep ice cream frozen without using dry ice.
Preparing for a trip to the beach already takes enough time and energy without having to somehow find dry ice.
Worry not my friend, you don’t need to waste your time and money on dry ice when you’ve got all the DIY tools at home to prepare the perfect summer day cooler.
Step 1: Homemade Ice Blocks
Got an old brownie pan laying around? Perfect. Simply fill it with water and freeze at least 6 hours before preparing your cooler.
This will create an amazing ice block that melts at a significantly slower rate than crushed ice.
Step 2: Lining the Cooler
This is a pro tip not many know about, (shhh). Did you know that aluminum foil has an emissivity of 0.04? That’s just a fancy way of saying it doesn’t give off heat.
We all have that family member that, midday, will open the cooler to look for a drink, only to leave it open for 10 minutes trying to find the strawberry-kiwi flavor they like best.
By lining the inside of your cooler with aluminum foil you’ll ensure that the sun doesn’t affect the contents while cousin Brad is fishing for his soda.
Step 3: Proper Preparation
Remember playing Tetris as a kid? Ok good, because those skills are about to come in handy.
- Ice blocks must go at the bottom to prevent early melting.
- Ice cream and drink go next (they’ll be ice cold for hours on end)
- (ONE LAYER OF CRUSHED ICE)
- Chilled snacks go on top of crushed ice (i.e. sandwiches, yogurt, fruit, etc)
- (ONE MORE LAYER OF CRUSHED ICE)
- Lukewarm snacks go last (i.e. gummy bears, packaged cookies, chocolate, etc)
- (LAST LAYER OF CRUSHED ICE)
- Wet Towel Method: after closing the cooler gently wet one towel with water and wrap it around the entire cooler.
Now It’s Time to Enjoy Your Summer
So, did this article make you feel like you’re ready to tackle ice blocks and aluminum foil yet?
Feel free to screenshot the DIY tools and try them out with friends and family. You know what they say, practice makes perfect!
Of course, while it’s easy to focus on melting ice cream and inconveniently warm drinks, the truth is keeping your cooler properly frozen is also very important for the environment.
108 billion pounds of food are thrown away each year in the United States alone. (Yes you read that right, billion).
Food waste is a serious issue, not only do we lose billions of nutritious meals, but all that plastic food packaging doesn’t get recycled.
Every time your food gets soggy or melts due to improper cooler prep, it all gets thrown in the trash along with the other 108 billion pounds. Even if you only have two or three beach trips per month, it adds up quickly.
It’s worth the extra effort to prepare homemade ice blocks if it means increasing the longevity of your food. Plus, with the price of products getting higher each year, who really wants to throw that cash away too?
FAQs
How long will ice cream stay frozen in a cooler?
If packed with standard crushed ice, ice cream will stay frozen for about 2 hours. However if packed with the tips listed above (ice blocks, insulation, etc) ice cream can stay frozen for up to 7 hours on a hot day.
How do you pack ice cream in a cooler?
As listed above, the position for packing ice cream in a cooler is crucial.
Ice cream should always be as close to the bottom of the cooler as possible, sandwiched between block ice and a layer of crushed ice. This will ensure its longevity and keep icy treats frozen for hours.
How do you travel with ice cream?
Just as proper precaution is taken when packing ice cream, it’s just as important to be cautious while transporting it.
After the ice cream has been tucked away deep into the frosty cooler, the cooler itself must be kept in a cool shady area as much as possible. I know, I know, finding shade at a sunny beach seems impossible, right?
Here are some tips for traveling with ice cream:
– Keep cooler in the trunk of the car if possible, or place out of direct sunlight if on a seat.
– Dig a hole in the sand (or dirt if on a camping trip) and place cooler inside. This will lower the temperature by several degrees.
– Cover with a large beach umbrella whenever possible.


